The Unified Payments Interface (UPI) has revolutionised digital payments in India. Offering a seamless and secure way to transfer money instantly, UPI has become an essential tool for everyday transactions. However, to ensure the security of your hard-earned money, setting up a strong UPI PIN is crucial. This guide will walk you through the process of setting up your UPI PIN, focusing on the user-friendly Bajaj Finserv app, while also exploring the general steps for other popular UPI apps.
What is UPI PIN?
A UPI PIN (Unified Payments Interface Personal Identification Number) is a 4 or 6-digit code that you set up to authorise transactions made through UPI-enabled apps. This PIN acts as a security measure, ensuring that only you can approve payments from your bank account. Each time you make a UPI transaction, you will be required to enter your UPI PIN to confirm the payment.
How to set a UPI PIN?
Setting up a UPI PIN is a simple process that can be done through any UPI-enabled app. Here are the steps:
1. Install a UPI payment app:
- Download and install a UPI-supported app like BHIM, Google Pay, PhonePe, or your bank’s UPI app.
2. Link your bank account:
- Open the app and enter your debit card details (last 6 digits and expiry date) to link your bank account.
3. Navigate to payment settings:
- Go to the ‘UPI PIN’ or ‘Payment Settings’ section within the app.
4. Set tour UPI PIN:
- Enter the last 6 digits of your debit card number and its expiry date.
- You will receive an OTP (One-Time Password) on your registered mobile number.
- Enter the OTP and then set your desired UPI PIN.
- Confirm the UPI PIN by entering it again.
How to change your UPI PIN?
If you need to change your UPI PIN, follow these steps:
1. Open your UPI payment app:
- Launch the app you use for UPI transactions.
2. Go to the UPI settings:
- Navigate to the ‘UPI’ or ‘Send Money’ section and select the bank account for which you want to change the PIN.
3. Select change PIN option:
- Tap on the ‘Change PIN’ option.
4. Enter required details:
- Provide the last 6 digits of your debit card number and its expiry date.
- Enter your current UPI PIN.
5. Set a new UPI PIN:
- Enter your new UPI PIN and confirm it by entering it again.
- Your UPI PIN will be updated, and you will receive a confirmation notification.
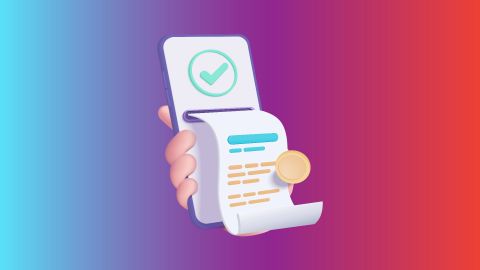
Why use a UPI PIN
A UPI PIN acts as your digital signature, authorising every transaction made through UPI. It's like a secret code that verifies your identity and ensures only you can access your funds. Here's why setting up a strong UPI PIN is paramount:
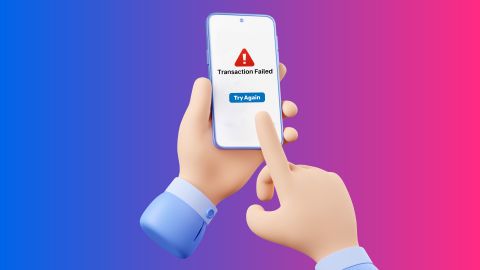
- Enhanced security: A strong UPI PIN adds an extra layer of protection against unauthorised transactions. Even if someone gains access to your phone number or UPI ID, they would not be able to make payments without your PIN.
- Peace of mind: Knowing your money is safeguarded with a secure PIN provides peace of mind when conducting online transactions.
- Convenience: Once your UPI PIN is set up, you can authorise transactions quickly and securely without the hassle of one-time passwords (OTPs) every single time.
Setting up your UPI PIN on Bajaj Finserv app
The Bajaj Finserv app offers a convenient and straightforward way to set up your UPI PIN. Here's a step-by-step guide:
- Download and launch the app: Ensure you have downloaded the Bajaj Finserv app from the Google Play Store or App Store. Launch the app and log in using your registered credentials.
- Navigate to UPI section: Look for the ‘UPI’ or ‘Bajaj Pay’ section within the app. This will typically be located on the home screen or in the financial services menu.
- Link your bank account: If you haven't already, link your bank account to your Bajaj Finserv wallet. This is a one-time process that allows you to initiate UPI transactions using your bank account balance.
- Set UPI PIN option: Once your bank account is linked, locate the ‘Set UPI PIN’ or ‘Create UPI PIN’ option. This might be available within the linked bank account details or a dedicated UPI settings menu.
- Enter debit card details: You'll be asked to enter the last six digits of your debit card linked to the chosen bank account, along with its expiry date. This step verifies your ownership of the bank account.
- Verify with OTP: An OTP will be sent to your registered mobile number linked to the bank account. Enter this OTP in the designated field within the app to verify your identity.
- Create your UPI PIN: Now comes the crucial part - creating your UPI PIN. Choose a four or six-digit PIN that's easy to remember but difficult for others to guess. Avoid using birthdays, anniversary dates, or easily identifiable sequences.
- Confirm your PIN: Re-enter your chosen UPI PIN to confirm it. Congratulations, you've successfully set up your UPI PIN on the Bajaj Finserv app!
The Bajaj Finserv BBPS platform is your one-stop solution for seamless and secure bill payments. Effortlessly manage a wide range of bills, from electricity and water to insurance premiums and loan EMIs, using a variety of digital payment options, including UPI, debit/credit cards, and net banking. With the added benefit of earning reward points, the Bajaj Finserv BBPS platform simplifies your financial management and helps you stay on top of your payment obligations.
Setting up your UPI PIN on other UPI apps
While the specific steps may vary slightly, the general process for setting up a UPI PIN on other popular UPI apps is similar:
- Download and login: Download and launch your chosen UPI app (e.g., PhonePe, Paytm, Google Pay) and log in using your registered credentials.
- Locate UPI Settings: Navigate to the UPI settings section within the app. This might be labelled as ‘UPI PIN,’ ‘Manage UPI,’ or similar.
- Link bank account (if needed): If you have not already, link your bank account to the UPI app.
- Set/change UPI PIN: Look for the ‘Set UPI PIN’ or ‘Change UPI PIN’ option, depending on whether this is your first time setting it up.
- Verify with debit card & OTP: Similar to the Bajaj Finserv app, you'll likely be asked to verify your bank account ownership using debit card details and an OTP sent to your mobile number.
- Create and confirm Your PIN: Choose your desired UPI PIN and confirm it by re-entering it.
Remember: Never share your UPI PIN with anyone, not even bank representatives or customer support personnel. UPI transactions are authorised solely through your PIN, so keeping it confidential is vital.
Using your UPI PIN for transactions:
Once your UPI PIN is set up, you can use it to authorise various transactions through the chosen UPI app. This includes sending and receiving money, paying bills at online merchants, and making in-store payments using QR codes.
Conclusion:
Setting up a strong UPI PIN is a critical step towards secure and convenient digital transactions. With the Bajaj Finserv app, the process is straightforward and user-friendly. Remember, the steps might differ slightly for other UPI apps, but the core principles remain the same – verify your bank account, create a strong PIN, and keep it confidential.
prioritize security by following best practices and enjoy the ease and convenience of UPI transactions.