How to Connect Hard Disk to TV

Connect an external hard disk to your TV via USB to access videos, photos, and music files. Play your media directly on the TV screen with ease.
Explore Televisions
3 min
10-Oct-2024
Connecting your hard disk to a TV can elevate your entertainment experience by giving you direct access to your stored media such as movies, music, and photos, on a larger screen. Most modern TVs come equipped with USB ports, making the connection process straightforward. Simply plug in your hard disk, switch the input source to USB using your TV remote, and start enjoying your media. If your TV does not recognise the hard disk, ensure it is formatted in a compatible file system like FAT32 or NTFS. Troubleshooting common issues can make the process smooth and efficient for all users.

If you are interested in televisions, take a moment to check it out on Bajaj Mall. Once you have gathered all the necessary details, head to any of Bajaj Finserv’s 1.5 lakh partner stores across 4,000 cities in India to discover a wide selection of TVs. Choose the model that best fits your needs and take advantage of zero down payment offers, making your purchase more affordable by converting the cost into Easy EMIs. You can also check hard disks at Bajaj Finserv’s partner stores.

How to connect a hard disk to your television: Overview

Connecting a hard disk to your television can unlock a whole new world of entertainment, allowing you to watch movies, view photos, or listen to music stored on your external device. The process is generally straightforward, but it may vary slightly depending on the type of TV and hard disk you are using. Most modern televisions, especially smart televisions, are equipped with USB ports that make it easy to connect external storage devices. However, it is important to ensure compatibility between your hard disk and TV to avoid potential issues, such as your device not being recognised. Understanding how to navigate these setups can greatly enhance your viewing experience.

Step-by-step guide: How to connect a hard disk to your TV

  • Check compatibility: Before connecting your hard disk, make sure that your TV supports external storage devices. This is usually the case with most modern HD vs HDR televisions, but always double check the specifications.
  • Locate the USB port: Your TV should have a USB port, usually located on the side or back. Plug your hard disk into this port. If you are using a 4K LED TV, make sure to check if there are any specific instructions for external device connections in the user manual.
  • Select the input source: Once the hard disk is connected, use your TV remote to select the correct input source. On most televisions, this can be done by pressing the 'Source' or 'Input' button and then selecting the USB option.
  • Browse your files: After selecting the USB input, you should be able to browse the files on your hard disk. Use your remote control to navigate through the folders and select the media you wish to view.
  • Play the content: Once you have selected a file, it should automatically start playing on your TV. You can control the playback using your TV remote, adjusting the volume, pausing, or skipping to the next file as you would with any other content.

Troubleshooting common issues: How to connect a hard disk to TV

If your hard disk is not recognised by the TV or you are facing other issues, there are a few steps you can take to troubleshoot. First, ensure that your hard disk is compatible with the TV's USB port. Some smart TVs might require that the hard disk be formatted in a specific file system, such as FAT32 or NTFS. If the TV still does not recognise the hard disk, try connecting it to a computer to see if the issue lies with the drive itself.

Next, consider the power requirements. Some hard disks need more power than the USB port on your TV can provide. If that is the case, you might need a powered USB hub to supply additional energy to the hard disk. Alternatively, try using a different USB port if your TV has multiple options.

Another common issue is that the TV might not support certain file formats. If your media files are not playing, check if your TV supports the format of the files on your hard disk. You may need to convert the files to a compatible format or use an external media player that supports a wider range of formats. Lastly, ensure that your TV’s firmware is up to date, as software updates often fix bugs and improve the compatibility of external devices.

If you are looking to buy a new smart TV or upgrade to a model that effortlessly connects to your hard disk, you can explore a wide range of options at any Bajaj Finserv partner store. With flexible financing options, you can find the perfect TV that meets your needs without worrying about the upfront cost.

Explore smart TVs on EMI with Bajaj Finserv

For those in search of a reliable smart TV, Bajaj Mall offers a wide range of options to explore. Once you have reviewed the product details, visit your nearest Bajaj Finserv partner store to pick your preferred model. With financing options from Bajaj Finserv, you can easily purchase your favourite TV without the burden of upfront costs. You also have the flexibility to choose a repayment tenure that suits your budget, allowing you to spread the cost over affordable EMIs. Bajaj Finserv provides financing solutions across various electronics as well.

Benefits of shopping for smart TVs using Bajaj Finserv's financing options

  • Affordable pricing: Get competitive pricing on smart TVs in Bajaj Finserv’s partner stores, making your purchase more budget friendly.
  • Easy EMIs: Buying a smart TV is easier with Bajaj Finserv's flexible EMIs, which help you pay for manageable instalments.
  • Zero down payment: Select smart TVs come with no upfront cost, letting you pay overtime without an initial down payment.
  • Wide range and accessibility: Access a diverse selection of smart TVs across multiple partner stores, ensuring the perfect fit for your home.
  • Special deals and cashback: Enjoy exclusive offers and cashback when you choose a smart TV through Bajaj Finserv’s financing options.
  • Complimentary home delivery: Benefit from free home delivery on selected smart TVs, making your shopping experience even more convenient.
Bajaj Finserv App for all your financial needs and goals

Trusted by 50 million+ customers in India, Bajaj Finserv App is a one-stop solution for all your financial needs and goals.

You can use the Bajaj Finserv App to:

Apply for loans online, such as Instant Personal Loan, Home Loan, Business Loan, Gold Loan, and more.

  • Explore and apply for co-branded credit cards online.
  • Invest in fixed deposits and mutual funds on the app.
  • Choose from multiple insurance for your health, motor and even pocket insurance, from various insurance providers.
  • Pay and manage your bills and recharges using the BBPS platform. Use Bajaj Pay and Bajaj Wallet for quick and simple money transfers and transactions.
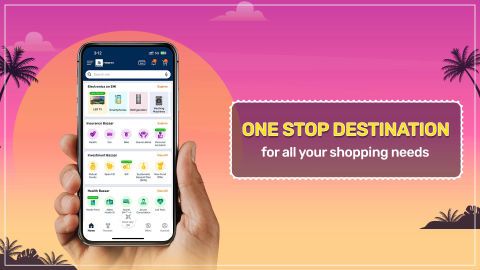
  • Apply for Insta EMI Card and get a pre-approved limit on the app. Explore over 1 million products on the app that can be purchased from a partner store on Easy EMIs.
  • Shop from over 100+ brand partners that offer a diverse range of products and services.
  • Use specialised tools like EMI calculators, SIP Calculators
  • Check your credit score, download loan statements, and even get quick customer support—all on the app.
Download the Bajaj Finserv App today and experience the convenience of managing your finances on one app.

Do more with the Bajaj Finserv App!

UPI, Wallet, Loans, Investments, Cards, Shopping and more

Disclaimer

While care is taken to update the information, products, and services included in or available on our website and related platforms/websites, there may be inadvertent inaccuracies or typographical errors or delays in updating the information. The material contained in this site, and on associated web pages, is for reference and general information purpose and the details mentioned in the respective product/service document shall prevail in case of any inconsistency. Subscribers and users should seek professional advice before acting on the basis of the information contained herein. Please take an informed decision with respect to any product or service after going through the relevant product/service document and applicable terms and conditions. In case any inconsistencies observed, please click on reach us.

*Terms and conditions apply

Show All Text

Frequently asked questions

How do I connect a hard disk to my TV for playback?
To connect a hard disk to your TV for playback, plug the hard disk into the USB port on your TV, typically located at the side or back. Once connected, use your remote to switch the input source to 'USB'. You should then be able to browse the content stored on the hard disk using your TV’s media player and select the files you wish to play.

What are the steps if my TV does not recognise the connected hard disk?
If your TV does not recognise the connected hard disk, first check if the hard disk is properly formatted in a supported file system like FAT32 or NTFS. Try using a different USB port or connecting the hard disk to another device to ensure it is functioning. If the problem persists, updating your TV's firmware or trying a powered USB hub for higher-power devices might help.

What file formats does my TV support for hard disk playback?
The file formats supported by your TV for hard disk playback may vary depending on the TV model. Commonly supported video formats include MP4, AVI, and MKV, while popular audio formats like MP3 and AAC are usually accepted. Always refer to your TV's user manual for the complete list of supported formats.

Can I use a USB or HDMI to connect a hard disk to the TV?
Generally, a hard disk connects to a TV via a USB port for playback. HDMI ports are primarily used for connecting media devices like computers, gaming consoles, or streaming devices. For hard disk connections, using the USB port is the most common and effective method.

Show More Show Less